NGINX Service Mesh(NSM)のセットアップ
0. 事前準備
このセットアップで以下のような環境をデプロイします
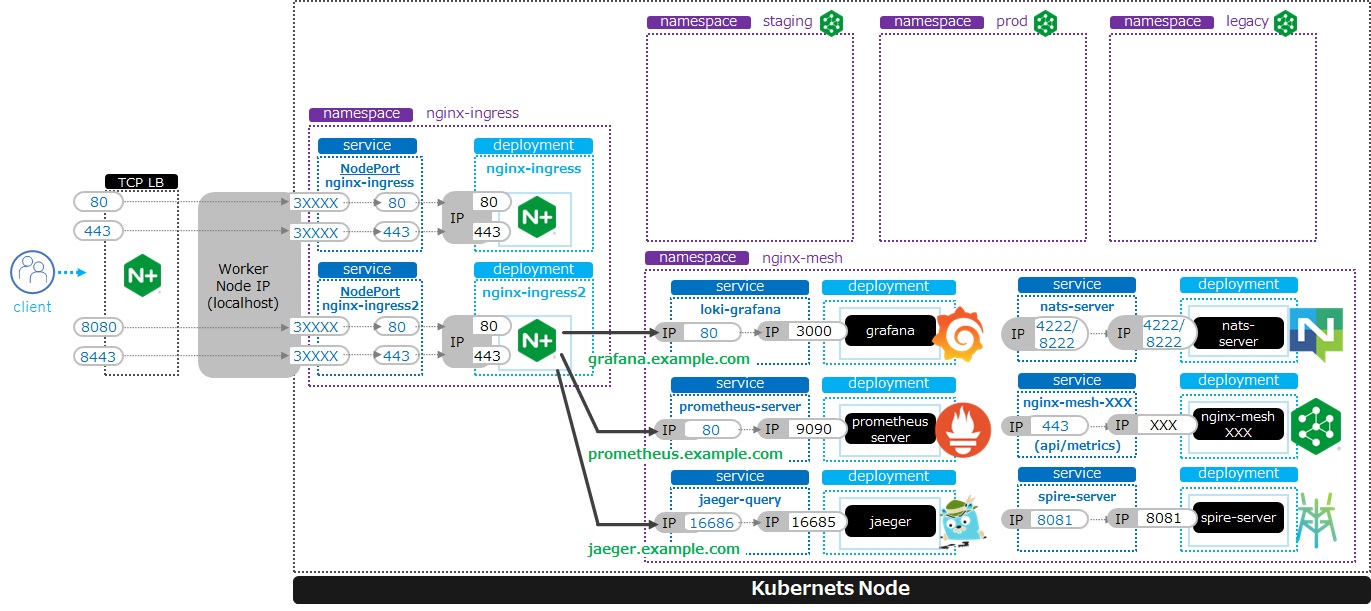
- Namespace
nginx-ingressにNIC、nginx-meshにNSMのコンポーネントをデプロイします - NSMのSidecarを挿入する対象のNamespaceとして
prod、staging、legacyをデプロイします - NSMの管理コンポーネントに接続するために
nginx-ingress2というNICをデプロイします - NSMのSidecarを挿入するアプリケーションに接続するために
nginx-ingressというNICをデプロイします
必要なファイルを取得します。
cd ~/
git clone https://github.com/BeF5/f5j-nsm-lab.git
cd ~/f5j-nsm-lab/prep
NSMテスト用のNamespaceを作成します
# cd ~/f5j-nsm-lab/prep
kubectl apply -f nsm-demo-ns.yaml
1 2 3 | namespace/prod created namespace/staging created namespace/legacy created |
NSM Install に利用する nginx-meshctl を Install します。
Lab環境ではすでにファイルをダウンロードしていますのでそちらを展開します。
皆様の環境でデプロイされる際には手順に従って nginx-meshctl CLI をダウンロードしてください。
cd ~/
ls -l nginx-meshctl_linux.gz
gunzip nginx-meshctl_linux.gz
sudo mv nginx-meshctl_linux /usr/local/bin/nginx-meshctl
sudo chmod +x /usr/local/bin/nginx-meshctl
CLIのVersionを確認します。
nginx-meshctl version
1 2 3 4 5 6 7 8 | nginx-meshctl - v1.4.0 Run 'nginx-meshctl status' to make sure that the NGINX Service Mesh is running. Also, ensure that the correct namespace was specified (default 'nginx-mesh') and that you are authorized to access services in your Kubernetes cluster. Unable to get versions for remaining components, make sure: - NGINX Service Mesh is installed in "nginx-mesh" namespace - Your kubectl config file "/home/ubuntu/.kube/config" is valid - Your Kubernetes context is set to a valid and running cluster, see "kubectl config get-contexts" Error message: not found |
1. NSMのセットアップ
NSMをInstallします。
Note
Install メッセージに出力されていますが、NSM v1.5.0 よりGrafana, Jaeger, Prometheus, Zipkinがインストールされませんので注意ください
nginx-meshctl deploy --image-tag 1.4.0 --enabled-namespaces="prod,staging" --mtls-mode=strict --disable-auto-inject --nginx-lb-method round_robin
Installには数分かかります。
1 2 3 4 5 6 7 8 | Warning: Deploying without persistent storage, not suitable for production environments.
For production environments ensure a default StorageClass is set.
Warning: In version 1.5, NGINX Service Mesh won't deploy Grafana, Jaeger, Prometheus, or Zipkin anymore.
How to integrate with your own servers: https://docs.nginx.com/nginx-service-mesh/guides/monitoring-and-tracing/
Deploying NGINX Service Mesh...
All resources created. Testing the connection to the Service Mesh API Server...
Connected to the NGINX Service Mesh API successfully.
NGINX Service Mesh is running.
|
Install結果確認します。
kubectl -n nginx-mesh get pods
1 2 3 4 5 6 7 8 9 | NAME READY STATUS RESTARTS AGE grafana-55cb6847fb-8f44m 1/1 Running 0 114s jaeger-56768b6dcb-pnp9v 1/1 Running 0 114s nats-server-54b55cb9c8-w9fhs 2/2 Running 0 113s nginx-mesh-api-64c974798b-cgsbc 1/1 Running 0 114s nginx-mesh-metrics-65496669fc-kmbb4 1/1 Running 0 114s prometheus-57f5b4cdc7-q5pv2 1/1 Running 0 113s spire-agent-w95ph 1/1 Running 0 114s spire-server-66c596b85c-rrm74 2/2 Running 0 114s |
2. NGINX Ingress Controller(NIC)セットアップ
NGINX Service Mesh で NGINX Ingress Controller(NIC)を利用するため、 以下の手順に従ってNICのデプロイを行います。
5. NGINX Ingress Controllerの実行 から以下のリンクから戻り、本ページの内容を参考に実行してください。
NGINX Ingress Controller(NIC) 環境のセットアップ
予め取得したDeploymentの内容を実行します コメントを付与した行の内容が適切に設定されていることを確認してください
1 2 3 4 5 6 7 8 9 10 11 12 13 14 15 16 17 18 19 20 21 22 23 24 25 26 27 28 29 30 31 32 33 34 35 36 37 38 39 40 41 42 43 44 45 46 47 48 49 50 51 52 | ** 省略 **
metadata:
labels:
app: nginx-ingress
nsm.nginx.com/deployment: nginx-ingress # NSM用の設定追加です
spiffe.io/spiffeid: "true" #
annotations:
prometheus.io/scrape: "true" # prometheusの設定を有効にします
prometheus.io/port: "9113" #
prometheus.io/scheme: http #
nsm.nginx.com/enable-ingress: "true" # NSM用の設定追加です
nsm.nginx.com/enable-egress: "true" #
** 省略 **
spec:
serviceAccountName: nginx-ingress
containers:
- image: registry.example.com/root/nic/nginxplus-ingress-nap-dos:2.1.0 # 対象のレジストリを指定してください
imagePullPolicy: IfNotPresent
name: nginx-plus-ingress
** 省略 **
add:
- NET_BIND_SERVICE
volumeMounts: # Spireに利用するVolumeをMountします
- mountPath: /run/spire/sockets #
name: spire-agent-socket #
env:
- name: POD_NAMESPACE
** 省略 **
args:
- -nginx-plus
- -nginx-configmaps=$(POD_NAMESPACE)/nginx-config
- -default-server-tls-secret=$(POD_NAMESPACE)/default-server-secret
- -enable-app-protect # App Protect WAFを有効にします
- -enable-app-protect-dos # App Protect DoSを利用する場合、有効にします
#- -v=3 # Enables extensive logging. Useful for troubleshooting.
#- -report-ingress-status
#- -external-service=nginx-ingress
- -enable-prometheus-metrics # Prometheusを有効にします
#- -global-configuration=$(POD_NAMESPACE)/nginx-configuration
- -enable-preview-policies # OIDCに必要となるArgsを有効にします
- -enable-snippets # OIDCで一部設定を追加するためsnippetsを有効にします
- -spire-agent-address=/run/spire/sockets/agent.sock # Spireのための設定を追加します
- -enable-latency-metrics # Metricsを有効にします
#- -enable-internal-routes
# Needed for UDP
# - -enable-preview-policies
# - -global-configuration=nginx-ingress/nginx-configuration
volumes: # Spireに利用するVolumeを作成します
- hostPath: #
path: /run/spire/sockets #
type: DirectoryOrCreate #
name: spire-agent-socket #
|
修正したマニフェストを指定しNICをデプロイします。
kubectl apply -f ~/f5j-nsm-lab/prep/nginx-plus-ingress-sm.yaml
1 | deployment.apps/nginx-ingress created |
kubectl get pods --namespace=nginx-ingress | grep nginx-ingress
1 | nginx-ingress-7f67968b56-d8gf5 1/1 Running 0 3s |
kubectl get deployment -n nginx-ingress | grep nginx-ingress
1 | nginx-ingress 1/1 1 1 2m52s |
NodePortをデプロイします。
## cd ~/kubernetes-ingress/deployments
kubectl apply -f service/nodeport.yaml
1 | service/nginx-ingress created |
3. 内部サービスにアクセスするためのNICをデプロイ
このラボでは、外部からNSMがデプロイした各リソースにアクセス出来るようにするため、NICを複数デプロイします。 複数のNICに必要な設定を行います
Ingress Classを作成します。
cd ~/f5j-nsm-lab/prep
kubectl apply -f ingress-class2.yaml
1 | ingressclass.networking.k8s.io/nginx2 created |
Deploymentを確認します。コメントを付与した行が適切な内容であることを確認してください。
1 2 3 4 5 6 7 8 9 10 11 12 13 14 15 16 17 18 19 20 21 22 23 24 25 26 27 28 29 30 31 32 33 34 35 36 37 | apiVersion: apps/v1 kind: Deployment metadata: name: nginx-ingress2 # 追加するNICを nginx-ingress2 とします namespace: nginx-ingress spec: replicas: 1 selector: matchLabels: app: nginx-ingress2 # 追加するNICを nginx-ingress2 とします template: metadata: labels: app: nginx-ingress2 # 追加するNICを nginx-ingress2 とします annotations: prometheus.io/scrape: "true" # prometheusの設定を有効にします prometheus.io/port: "9113" # prometheus.io/scheme: http # # nsm.nginx.com/enable-ingress: "true" spec: serviceAccountName: nginx-ingress containers: - image: registry.example.com/root/nic/nginxplus-ingress-nap-dos:2.1.0 # 対象のレジストリを指定してください imagePullPolicy: IfNotPresent name: nginx-plus-ingress ** 省略 ** args: - -nginx-plus - -nginx-configmaps=$(POD_NAMESPACE)/nginx-config - -default-server-tls-secret=$(POD_NAMESPACE)/default-server-secret - -enable-app-protect # App Protect WAFを有効にします - -enable-app-protect-dos # App Protect DoSを利用する場合、有効にします #- -v=3 # Enables extensive logging. Useful for troubleshooting. #- -report-ingress-status #- -external-service=nginx-ingress #- -enable-prometheus-metrics - -ingress-class=nginx2 # Ingress Classを nginx2 と指定します |
NIC(nginx-ingress2)をデプロイします。
## cd ~/f5j-nsm-lab/prep
kubectl apply -f nginx-plus-ingress-sm2.yaml
1 | deployment.apps/nginx-ingress2 created |
ステータスを確認します。
kubectl get pods -n nginx-ingress
1 2 3 4 | NAME READY STATUS RESTARTS AGE appprotect-dos-arb-5d89486bbc-fqgbx 1/1 Running 0 28m nginx-ingress-8558f76867-xsqmz 1/1 Running 0 18m nginx-ingress2-5966f7c78d-hj9d2 1/1 Running 0 5s |
NodePortをデプロイします。
# cd ~/f5j-nsm-lab/prep/
kubectl apply -f nodeport2.yaml
1 | service/nginx-ingress2 created |
NodePortの情報を確認します
kubectl get svc -n nginx-ingress | grep nginx-ingress
1 2 | nginx-ingress NodePort 10.108.4.145 <none> 80:31727/TCP,443:31592/TCP 18m nginx-ingress2 NodePort 10.101.208.219 <none> 80:31441/TCP,443:32278/TCP 25s |
それぞれに表示されているポート番号を確認してください。これらの情報を元に、NGINXの設定を作成します。
## cd ~/f5j-nsm-lab/prep/
vi nginx.conf
以下の内容を参考に、先程確認したNodePortで割り当てられたポート番号宛に通信を転送するように、NGINXを設定します。
1 2 3 4 5 6 7 8 9 10 11 12 13 14 15 16 17 18 19 20 21 22 23 24 25 | # TCP/UDP load balancing
#
stream {
## TCP/UDP LB for NIC/NSM ingressclass
server {
listen 80;
proxy_pass localhost:31727; # nic1 http port of NodePort
}
server {
listen 443;
proxy_pass localhost:31592; # nic 1 https port of NodePort
}
## TCP/UDP LB for NIC2 nginx2 ingressclass
server {
listen 8080;
proxy_pass localhost:31441; # nic2 http port of NodePort
}
server {
listen 8443;
proxy_pass localhost:32278; # nic2 https port of NodePort
}
}
|
設定をコピーし、反映します
# cd ~/f5j-nsm-lab/prep/
sudo cp /etc/nginx/nginx.conf /etc/nginx/nginx.conf-
sudo cp nginx.conf /etc/nginx/nginx.conf
sudo nginx -s reload
NSMでデプロイした各種サービスへアクセスするためのIngressを設定します
# cd ~/f5j-nsm-lab/prep/
kubectl apply -f prometheus-ingress.yaml
kubectl apply -f jaeger-ingress.yaml
kubectl apply -f grafana-ingress.yaml
作成されたリソースを確認します。
kubectl get ingress -n nginx-mesh
1 2 3 4 | NAME CLASS HOSTS ADDRESS PORTS AGE grafana-ingress nginx2 grafana.example.com 80 26s jaeger-ingress nginx2 jaeger.example.com 80 32s prometheus-ingress nginx2 prometheus.example.com 80 96s |
踏み台ホストのブラウザ(Chrome)よりそれぞれのサービスのURLへアクセスいただくことにより、画面をご覧頂くことが可能です。
Note
Install メッセージに出力されていますが、NSM v1.5.0 よりGrafana, Jaeger, Prometheus, Zipkinがインストールされませんので注意ください
Prometheus:
http://prometheus.example.com:8080/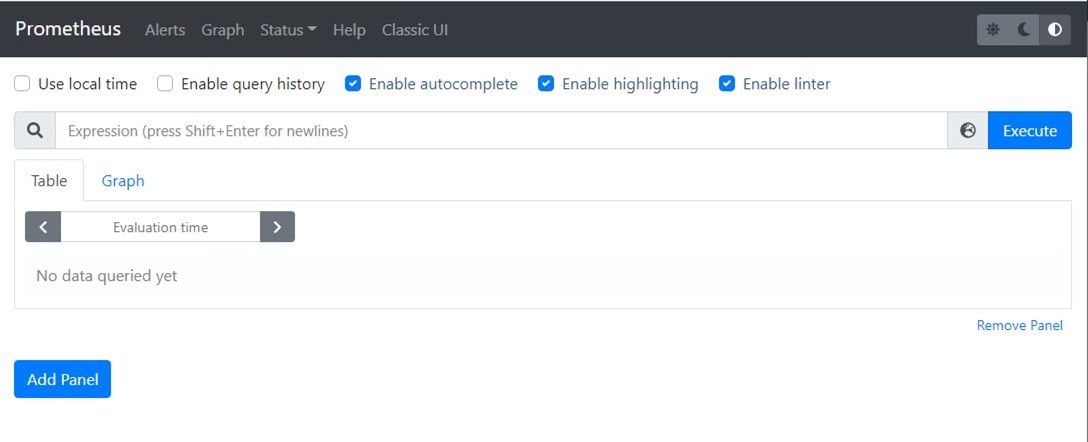
Jaeger:
http://jaeger.example.com:8080/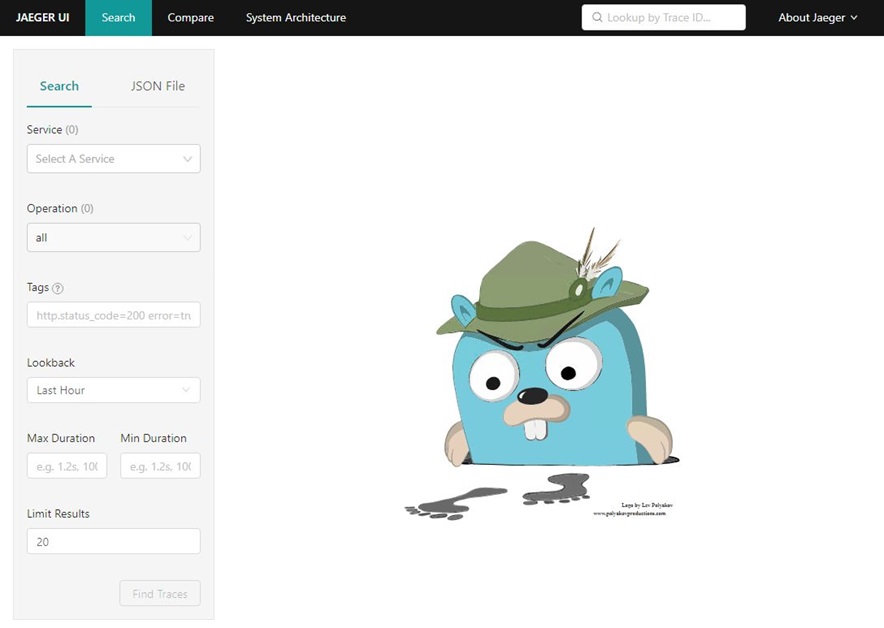
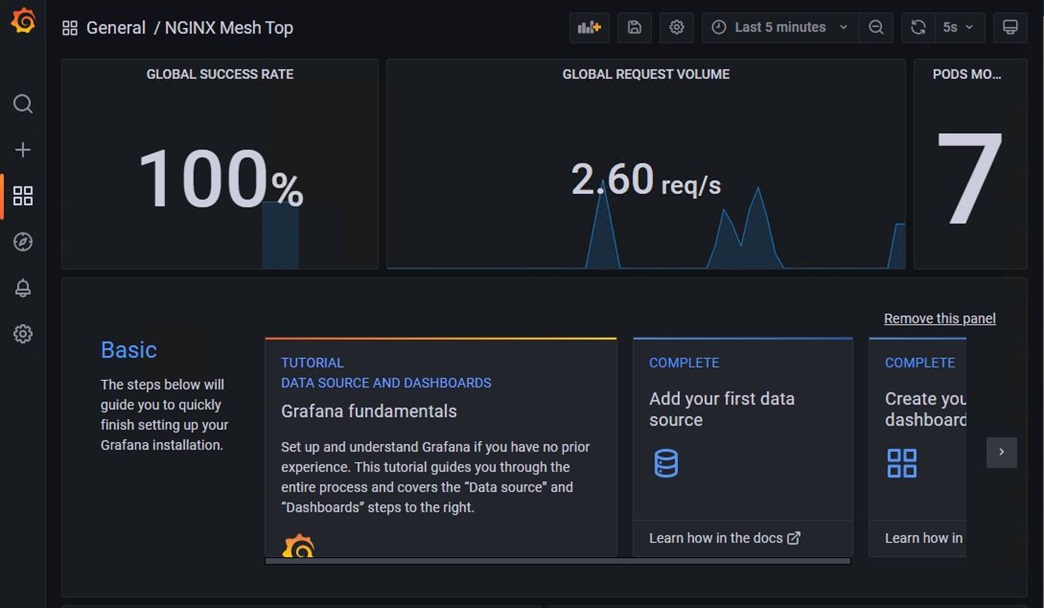
Grafana:
http://grafana.example.com:8080/